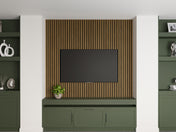
If you’re looking to reduce noise and improve sound quality in your home or workspace, installing acoustic wall panels is a fantastic solution. These panels absorb sound waves, preventing echoes and creating a more pleasant acoustic environment. Here’s a comprehensive guide to help you install acoustic wall panels like a pro.
Step 1: Gather Your Tools and Materials
Before starting the installation, ensure you have all the necessary tools and materials:
-
Acoustic wall panels
-
Measuring tape
-
Level
-
Pencil or chalk
-
Adhesive (e.g., construction adhesive or double-sided mounting tape)
-
Screws and wall anchors (optional)
-
Drill (if using screws)
-
Utility knife (for trimming panels if needed)
Step 2: Choose the Right Location
The placement of your acoustic panels is crucial for their effectiveness. Identify the areas in your room where sound reflection is the highest, such as walls opposite speakers or near windows. For optimal sound absorption:
-
Use panels on the first reflection points (where sound bounces first).
-
Consider covering at least 20-30% of the wall area for noticeable results.
Step 3: Measure and Mark the Wall
Use a measuring tape and level to determine where the panels will go. Mark the spots lightly with a pencil or chalk. This ensures proper alignment and symmetry, especially if you’re installing multiple panels.
Tips:
-
Start from the center of the wall and work outward for an even look.
-
Maintain equal spacing between panels for a professional appearance.
Step 4: Prepare the Panels
Some panels may require a light cleaning to remove dust. If trimming is necessary to fit specific areas, use a utility knife or a straight edge for precise cuts.
Step 5: Attach the Panels
You have two primary methods for attaching acoustic panels: adhesive or screws.
Using Adhesive:
-
Apply a generous amount of construction adhesive or attach double-sided mounting tape to the back of each panel.
-
Press the panel firmly onto the wall, holding it in place for 30-60 seconds to ensure a strong bond.
Using Screws:
-
Drill holes into the wall where you marked earlier.
-
Insert wall anchors if needed.
-
Screw the panels into place, ensuring they’re level.
Step 6: Check Alignment and Adjust
Step back and inspect your work. Use a level to ensure the panels are straight and evenly spaced. Make any necessary adjustments before the adhesive fully sets.
Step 7: Finishing Touches
Clean up any excess adhesive around the edges. If the panels have a fabric surface, brush them lightly to remove smudges or fingerprints.
Bonus Tips for Best Results
-
Room Coverage: For larger spaces, consider combining wall panels with ceiling panels or corner bass traps for improved sound control.
-
Panel Design: Acoustic panels come in various colors and patterns. Choose designs that complement your decor for a stylish touch.
-
Maintenance: Regularly dust the panels to keep them clean and maintain their performance.
Installing acoustic wall panels is an easy and effective way to enhance the sound quality of any room. With proper planning and execution, you’ll create a quieter, more comfortable environment in no time!


