**NEW** 2 Pack Floating Shelves complementing our Aged Oak Farmhouse Mantels!
Free Shipping on all Domestic Orders! Order your Real Wood enhancements for your home today!
Your cart is empty
Subtotal:$0.00 USD
Loading...
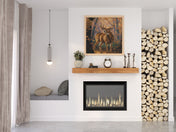
Modern Farmhouse Fireplace Mantel
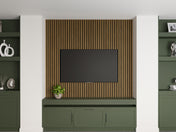
2-Pack Acoustic Wood Wall Panels
Questions?
Expert help & advice
Responsibly Sourced Wood
Our artisans turn responsibly harvested wood into stunning mantels, barn doors, and shutters.
Quality Guaranteed
Our promise to you